Czytelniku! Prosimy pamiętać, że wszelkie instrukcje i porady wprowadzone na naszej stronie nie zastąpią osobistej konsultacji ze specjalistą/profesjonalistą. Branie przykładu z treści zawartych na naszym blogu w praktyce zawsze powinno być konsultowane z odpowiednio wykwalifikowanym specjalistą. Redakcja i wydawcy tej strony internetowej nie są w żaden sposób odpowiedzialni ze stosowania informacji zamieszczanych w serwisie.
Transforming your backyard into a summer oasis is easier than you think with a DIY above ground pool. By following a few simple steps, you can create a refreshing and enjoyable space for your family and friends to beat the heat during the summer months. In this guide, we will explore the process of building an above ground pool and offer valuable tips to help you achieve optimal results.
- Planning and Site Preparation:
Before embarking on your DIY project, thorough planning and site preparation are essential. Start by selecting the perfect location for your above ground pool. Ensure the area is level and free of any obstructions such as trees or utility lines. Measure the available space and consider factors such as sunlight exposure and proximity to water and electrical sources. - Selecting the Pool:
Choosing the right above ground pool is crucial for creating your backyard oasis. There are various options available, including steel, resin, or hybrid pools. Consider factors such as durability, ease of installation, and maintenance requirements when making your selection. Additionally, ensure that the pool size fits the available space and meets your desired capacity. - Gathering Materials and Tools:
To successfully complete your DIY above ground pool project, you will need several materials and tools. These may include pool walls, liners, sand, concrete blocks, a pump, a filter system, plumbing supplies, and a pool ladder. It’s important to gather all the necessary items before starting the construction process to avoid any delays. - Pool Installation:
Begin the installation process by assembling the pool walls according to the manufacturer’s instructions. Ensure they are properly aligned and secure. Next, spread a layer of sand evenly within the pool’s perimeter to create a smooth base. Place the pool liner on top of the sand, ensuring it is centered and wrinkle-free. Once the liner is in place, attach it securely to the pool walls. - Plumbing and Filtration:
Setting up the plumbing and filtration system is crucial for maintaining the cleanliness and hygiene of your above ground pool. Connect the pump and filter system according to the manufacturer’s guidelines. Install the necessary plumbing supplies, including the suction and return lines, skimmer, and pool jets. It’s essential to test the system for leaks and ensure proper water circulation before filling the pool. - Finishing Touches:
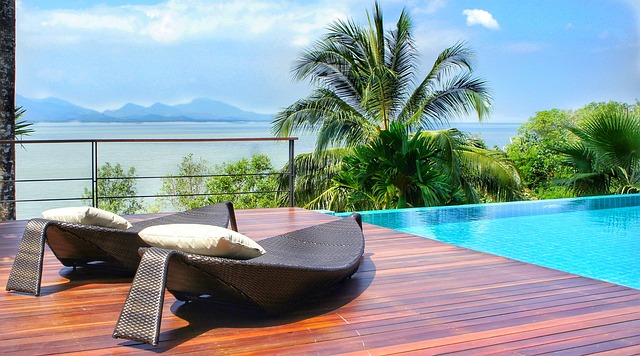
Now that the structural elements of your DIY above ground pool are in place, it’s time to add some finishing touches to enhance the overall aesthetic appeal. Consider adding a deck or patio area around the pool for lounging and relaxation. Install outdoor lighting to create a warm ambiance during the evenings. Additionally, landscaping the surrounding area with plants and flowers can add a touch of natural beauty to your summer oasis. - Pool Maintenance:
Once your DIY above ground pool is complete, regular maintenance is essential to ensure its longevity and optimal performance. Familiarize yourself with proper water chemistry and testing procedures. Invest in a pool cover to protect the water from debris when not in use. Regularly clean the pool walls, floor, and filter system to keep the water clean and clear. Following a consistent maintenance routine will help you enjoy your backyard oasis for years to come.
How to Build an Affordable DIY Above Ground Pool in Your Backyard
Transforming your backyard into a summer oasis doesn’t have to break the bank. With a little creativity, technical know-how, and a commitment to DIY, you can build an affordable above ground pool right in your own backyard. In this guide, we’ll take you through the step-by-step process of constructing a budget-friendly DIY above ground pool that will provide endless hours of summer fun for you and your family.
- Planning and Preparation:
Before you dive into the construction process, careful planning and preparation are essential. Consider the size and shape of the pool you want to build, keeping in mind the available space in your backyard. Measure the area and sketch out a design that suits your requirements. Additionally, determine the budget for your project and make a list of necessary materials and equipment. - Site Preparation:
Clear the designated area of any debris, rocks, or vegetation that could interfere with the construction process. Level the ground using a shovel or a garden rake to ensure a smooth and stable base for your pool. It’s crucial to create a solid foundation to prevent any structural issues down the line. - Pool Frame Construction:
The pool frame serves as the skeleton of your above ground pool. Opt for sturdy, affordable materials such as treated lumber or metal. Cut the materials to the required lengths according to your design specifications and assemble the frame following the manufacturer’s instructions. Use galvanized screws or nails for added durability. - Installing the Pool Liner:
The pool liner acts as a waterproof barrier, ensuring that your pool holds water effectively. Choose a high-quality liner that fits the dimensions of your pool frame. Start by unrolling the liner and carefully positioning it inside the frame, making sure it covers the entire interior. Smooth out any wrinkles or folds, and secure the liner to the frame using liner clips or another suitable fastening method. - Plumbing and Filtration System:
To keep your DIY above ground pool clean and safe for swimming, you’ll need a plumbing and filtration system. Install a pool pump, filter, and skimmer, connecting them with PVC pipes and fittings. Consult relevant manuals or seek professional advice to ensure proper installation and operation of the system. Remember to consider the location of your pool in relation to a power source for electrical components. - Decking and Safety Features:
Enhance the functionality and aesthetics of your DIY above ground pool by adding a deck around its perimeter. A well-constructed deck provides space for lounging, sunbathing, and easy access to the pool. Use pressure-treated lumber or composite decking materials for durability and longevity. Additionally, prioritize safety by installing a pool ladder or steps, a pool cover, and a fence to prevent unauthorized access. - Water Treatment and Maintenance:
Proper water treatment and maintenance are crucial for the longevity and cleanliness of your DIY above ground pool. Regularly test the water quality and adjust the chemical balance using appropriate pool testing kits and chemicals. Skim the pool’s surface, vacuum the bottom, and clean the filter regularly to remove debris and maintain optimum filtration efficiency.

Step-by-Step Guide: Creating Your Own DIY Above Ground Pool
Are you looking to transform your backyard into a summer oasis? Building your own DIY above ground pool can be a rewarding project that combines craftsmanship, creativity, and relaxation. In this step-by-step guide, we will walk you through the process of creating your very own above ground pool. Get ready to dive into the world of pool construction!
- Planning and Design
Before diving into the construction process, careful planning and design are essential. Consider the available space in your backyard, local building regulations, and any potential utility lines that may be present underground. Sketch out your pool design, incorporating specific dimensions and features you desire, such as deck areas or water features. - Gathering Materials
To construct your above ground pool, you will need a variety of materials. Start by acquiring a durable pool liner made from high-quality materials like vinyl or PVC. Next, obtain pressure-treated lumber or composite decking for the pool’s framework. Other necessary materials include concrete blocks, galvanized nails or screws, sand, gravel, and plumbing fittings for filtration and circulation. - Site Preparation
Prepare the site where your pool will be located. Clear the area of any vegetation, rocks, or debris. Ensure the ground is level and stable. Use a tape measure and a level to verify the evenness of the ground. If necessary, make adjustments by adding or removing soil until the area is perfectly level. - Installing the Framework
Begin by constructing the pool’s framework using pressure-treated lumber or composite decking. Build a rectangular or circular structure, depending on your design. Use galvanized nails or screws to secure the framework together, ensuring stability and durability. Be precise with your measurements and ensure the corners are square. - Building the Walls
Attach the pool liner to the framework by carefully following the manufacturer’s instructions. Make sure the liner is properly aligned and stretched to avoid any wrinkles or sagging. Secure the liner to the framework using the provided clips or adhesive. As you progress, periodically check the liner’s position to ensure it remains in place. - Plumbing and Filtration
Install the necessary plumbing and filtration system to ensure proper water circulation and filtration. Consult a professional or refer to detailed instructions to correctly connect the pool pump, filter, and plumbing fittings. Consider incorporating a skimmer to remove debris from the surface of the water and a return jet to circulate and aerate the water. - Adding the Finishing Touches
Once the pool structure is complete and the plumbing is connected, it’s time to add the finishing touches. Surround the pool with a deck or a paved area for lounging and easy access. Install any desired accessories such as ladders, handrails, or diving boards, ensuring they meet safety standards. Consider landscaping around the pool to enhance its aesthetic appeal. - Filling and Testing
After completing the construction, fill the pool with water. Ensure the pool is filled to the recommended level and check for any leaks or irregularities. Test the filtration system and adjust it as necessary to maintain optimal water quality. It’s also crucial to test the water chemistry and add the appropriate chemicals to achieve a safe and balanced pool environment. - Safety Measures
Always prioritize safety when enjoying your DIY above ground pool. Install a sturdy fence around the pool area with a self-closing gate to prevent unauthorized access, especially if you have children or pets. Consider adding pool alarms and safety covers to further enhance the security of your pool.

Best Materials for a Sturdy and Long-lasting DIY Above Ground Pool
When it comes to transforming your backyard into a summer oasis with a DIY above ground pool, choosing the right materials is crucial for ensuring durability and longevity. By selecting high-quality components and employing sound construction techniques, you can create a sturdy structure that will withstand the test of time. In this article, we will explore the best materials to use for building a DIY above ground pool that is built to last.
- Steel or Aluminum Frame:
The frame forms the backbone of your above ground pool, providing structural support and stability. Steel or aluminum are excellent choices for constructing the frame due to their strength and resistance to corrosion. These materials offer exceptional durability, ensuring that your pool remains robust even under the pressure of water and usage. Additionally, steel and aluminum frames are relatively lightweight, making them easier to handle during the installation process. - Resilient Pool Liner:
The pool liner is an essential component that prevents water leakage and provides a smooth and comfortable surface for swimmers. Opt for a pool liner made of durable vinyl or reinforced PVC materials. These materials are known for their excellent resistance to UV rays, chemicals, and punctures. A high-quality liner will enhance the longevity of your pool, as it will be less susceptible to damage from sun exposure, pool chemicals, and general wear and tear. - Heavy-duty Pool Wall:
The pool wall is another critical element that contributes to the strength and stability of your above ground pool. Consider using materials like galvanized steel or reinforced resin for the pool wall. Galvanized steel is highly resistant to rust and corrosion, ensuring that your pool remains in optimal condition even when exposed to the elements. Reinforced resin is also a viable option as it offers excellent durability and is impervious to rotting, warping, and rusting. - Sturdy Pool Supports:
To reinforce the structure of your DIY above ground pool, robust pool supports are necessary. These supports distribute the weight of the water evenly and provide additional stability. Opt for materials like galvanized steel or durable resin for the pool supports. Galvanized steel is known for its strength and corrosion resistance, making it an ideal choice for load-bearing components. Durable resin is lightweight, yet exceptionally strong, and offers excellent resistance to the elements. - High-quality Pool Pump and Filter:
While not directly related to the construction of the pool itself, a reliable pool pump and filter are vital for maintaining water quality and preventing damage to the pool structure. Invest in a high-quality pump and filter system that can efficiently circulate and clean the water. Look for components made from corrosion-resistant materials like stainless steel or reinforced plastics to ensure longevity and optimal performance.
Budget-Friendly DIY Above Ground Pool Designs for Every Space
Looking to transform your backyard into a summer oasis without breaking the bank? Look no further! In this article, we will explore budget-friendly DIY above ground pool designs that are suitable for every space. Whether you have a small patio or a sprawling garden, there’s a solution for you.
- Intimate Retreat: Compact and Cozy
For those with limited space, an intimate retreat pool design is the perfect choice. Opt for a smaller-sized above ground pool that can fit snugly into a corner of your backyard. These pools are usually circular or rectangular and come in various sizes to accommodate your needs. With the right decking and landscaping, you can create a cozy and inviting atmosphere perfect for relaxing and enjoying the summer sun. - Classic Rectangle: Timeless Elegance
If you prefer a more traditional look, a classic rectangle above ground pool design might be the ideal option. These pools mimic the shape of traditional in-ground pools and provide a sophisticated touch to your outdoor space. With proper installation and some creative landscaping, you can achieve a high-end aesthetic without the hefty price tag. Add some stylish pool accessories and lounge chairs to complete the luxurious ambiance. - Natural Oasis: Blend with the Environment
For nature enthusiasts, a natural oasis above ground pool design seamlessly integrates with the surrounding environment. Choose a pool with wooden or stone-like siding that mimics natural materials. Enhance the ambiance by incorporating lush greenery, rocks, and water features around the pool area. This design not only creates a tranquil atmosphere but also adds a touch of eco-friendliness to your backyard. - Multi-Level Marvel: Maximizing Space
If you have a sloping or uneven backyard, a multi-level above ground pool design can be a game-changer. By incorporating decking and raised platforms, you can make the most of your available space while creating a visually stunning pool area. The different levels not only add aesthetic appeal but also provide functional areas for sunbathing, lounging, and entertainment. Consider installing lighting features to further enhance the ambiance during nighttime gatherings. - Contemporary Elegance: Sleek and Modern
For those who appreciate a clean and minimalist aesthetic, a contemporary above ground pool design fits the bill. Opt for a pool with sleek lines, metallic finishes, and minimalist features. Pair it with a modern deck made of composite materials or concrete for a seamless and elegant look. Keep the surrounding landscaping simple and well-maintained to complement the pool’s sleek design. - Pool-Side Paradise: Outdoor Entertainment
If you love hosting poolside parties and gatherings, a pool-side paradise design is the way to go. Choose an above ground pool that allows for ample space around the perimeter to accommodate seating and entertainment areas. Consider building a deck or patio adjacent to the pool where guests can relax, dine, and enjoy the festivities. Install a shade structure or pergola to provide relief from the sun and create a more comfortable environment.

Enhance Your DIY Above Ground Pool with Creative Decking Ideas
If you’re looking to elevate your DIY above ground pool and transform your backyard into a summer oasis, consider incorporating creative decking ideas into your design. A well-designed deck not only enhances the aesthetic appeal of your pool but also provides additional functional space for relaxation and entertainment. In this article, we will explore various decking options and discuss how they can take your DIY above ground pool to the next level.
- Composite Decking:
One popular choice for decking around an above ground pool is composite decking. This innovative material combines the natural look and feel of wood with the durability and low-maintenance qualities of plastic. Composite decking is resistant to fading, staining, and rot, making it an ideal option for outdoor use. Additionally, it offers enhanced traction, ensuring safety when walking around the pool area. - Elevated Deck:
To add visual interest and create a seamless transition from your pool to the surrounding landscape, consider building an elevated deck. An elevated deck provides a designated area for sunbathing, lounging, and outdoor dining. By incorporating stairs or a ramp, you can easily access the pool while maintaining a cohesive and stylish look. - Multi-Level Decking:
For a truly unique and captivating design, opt for multi-level decking. This approach involves constructing two or more platforms at different heights, connected by stairs or ramps. Multi-level decking offers a variety of benefits, including increased seating and entertaining areas, designated spaces for different activities, and an enhanced sense of depth and dimension. - Wraparound Deck:
If you have ample space in your backyard, consider a wraparound deck that encircles your DIY above ground pool. This design not only maximizes the usable area but also creates a visually appealing feature. A wraparound deck allows for easy access to the pool from various directions and provides plenty of space for sun loungers, patio furniture, and even a barbecue area. - Built-in Seating and Storage:
To optimize functionality and convenience, incorporate built-in seating and storage into your deck design. Built-in benches or seating areas provide comfortable spots to relax and unwind, while hidden storage compartments can be used to stow away pool accessories, cushions, and other items, keeping the area clutter-free. - Lighting:
Don’t forget to consider lighting options when planning your deck around the above ground pool. Proper lighting not only enhances safety but also creates a cozy and inviting ambiance during evening gatherings. Incorporate deck post lights, recessed step lights, or string lights to illuminate the space and extend the usability of your pool area into the night.

Maintenance Tips for Keeping Your DIY Above Ground Pool Clean and Safe
Maintenance Tips for Keeping Your DIY Above Ground Pool Clean and SafeTransform Your Backyard into a Summer Oasis with a DIY Above Ground Pool! One of the key aspects of enjoying your pool to the fullest is ensuring that it remains clean and safe throughout the swimming season. By following these maintenance tips, you can keep your DIY above ground pool in optimal condition, providing a refreshing and enjoyable experience for you, your family, and friends. With a combination of regular cleaning routines and proper chemical balance, your pool will be a sparkling oasis all summer long.
- Skimming and Cleaning:
Regular skimming is essential to remove leaves, debris, and other foreign objects that may accumulate on the surface of your pool. Using a leaf skimmer net, skim the pool daily to maintain its cleanliness. Additionally, invest in a pool vacuum or a robotic cleaner to effectively remove dirt, sand, and smaller particles that may settle on the bottom of your pool. By incorporating these cleaning practices into your routine, you can prevent the accumulation of debris and ensure a clear swimming area. - Brushing and Scrubbing:
To prevent the growth of algae and other organisms, it is crucial to brush and scrub the walls, floor, and steps of your above ground pool. Use a pool brush with sturdy bristles to remove any algae or dirt buildup. Pay special attention to hard-to-reach areas and corners where algae can thrive. By incorporating regular brushing and scrubbing into your maintenance routine, you can maintain a clean and algae-free pool. - Water Circulation:
Proper water circulation is vital for maintaining a clean and healthy pool. Run your pool pump for an appropriate duration each day to ensure optimal water flow. This helps in distributing the chemicals evenly and filtering out impurities. Aim for at least 8 to 10 hours of circulation per day, adjusting the duration based on the size of your pool and the manufacturer’s recommendations. - Maintaining Chemical Balance:
Maintaining the proper chemical balance in your DIY above ground pool is crucial for sanitization and preventing the growth of bacteria and algae. Regularly test the water using a pool testing kit to monitor the pH level, chlorine, alkalinity, and other chemical parameters. Adjust the chemical levels as needed to maintain the recommended ranges. This will ensure safe and clean water for swimming. - Shock Treatment:
Perform regular shock treatments to oxidize and eliminate any contaminants that may have built up in the water. Shock treatments help break down organic matter and maintain clear water. Follow the manufacturer’s instructions regarding the dosage and frequency of shock treatments based on your pool’s size and usage. - Filter Maintenance:
The pool filter plays a crucial role in trapping debris and maintaining water clarity. Clean or backwash the filter regularly to prevent clogging and ensure optimal filtration. Refer to your pool’s instruction manual for specific guidelines on filter maintenance and cleaning procedures. - Inspecting and Repairing:
Regularly inspect your above ground pool for any signs of damage or wear. Check for leaks, loose fittings, or cracks in the pool structure. Address any issues promptly to prevent further damage and ensure the safety of swimmers. Consult a professional if you require assistance in repairing or replacing any components of your DIY above ground pool.
Finally you have written something interesting. 😀